Color drenching means painting walls, ceiling, and trim the same color. One color. Everywhere. The whole room gets swallowed up in it—which sounds terrifying until you see it done right. Then it's the most sophisticated thing you've ever seen.
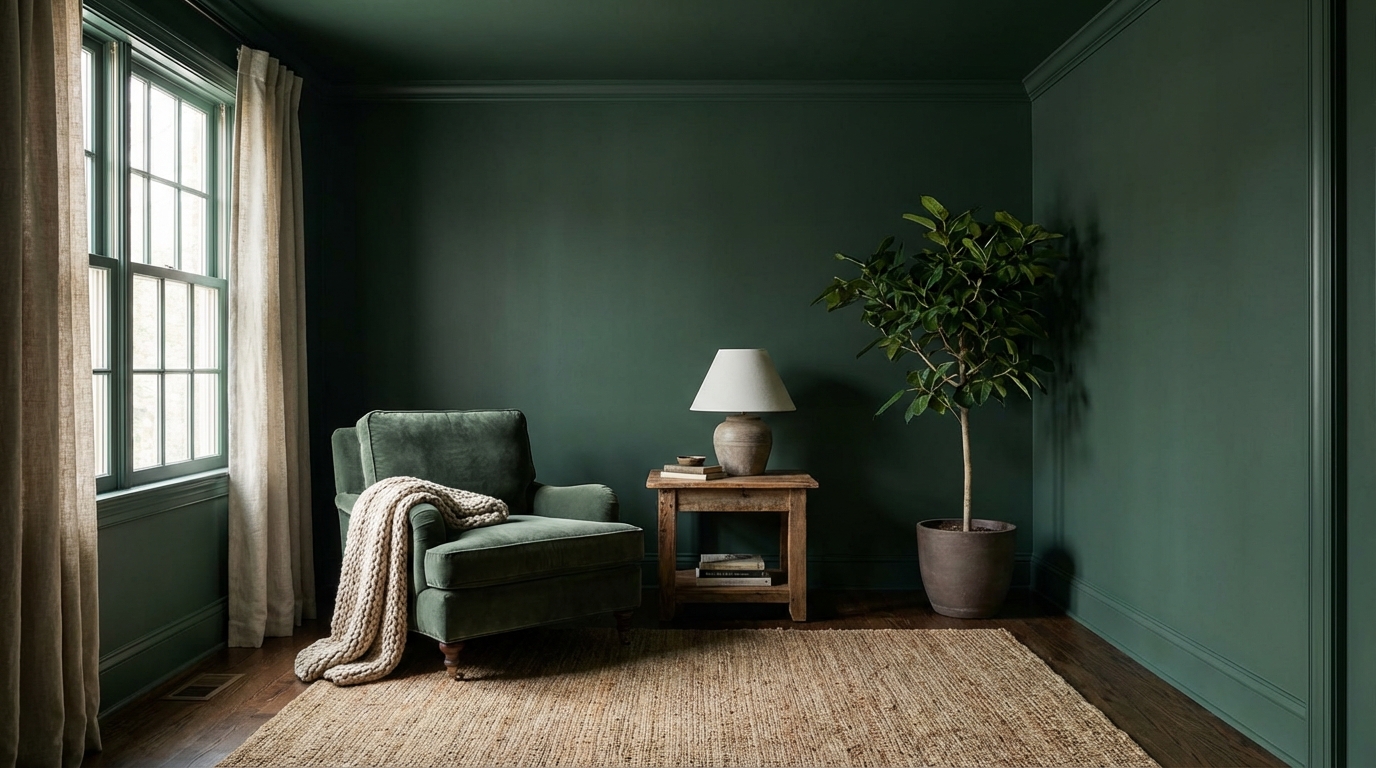
I'll be honest, when I first heard the term a couple years ago, I thought it was just interior-designer speak for "being too lazy to pick a trim color." Then I walked into a friend's dining room where she'd drenched the whole thing in a deep forest green—walls, ceiling, crown molding, baseboards, all of it. I stood in the doorway for a solid ten seconds not saying anything. It was like stepping into a jewel box. Completely immersive.
That's the point. And it's the biggest paint trend of 2026 by a wide margin.
Why Color Drenching Works
Traditional painting creates contrast—white ceiling, colored walls, white trim. Your eye follows those boundaries. The room reads as a box with six surfaces.
Color drenching eliminates those boundaries. When everything is the same color, the edges disappear. The room stops feeling like a box and starts feeling like a space. The architecture fades and the mood takes over.
There's actual psychology behind it too. Designers call it the "cocooning effect"—when a room wraps around you in one continuous color, your brain relaxes. You feel enclosed in a good way, not a claustrophobic way. Think of it like being inside a cloud versus being inside a cardboard box. Same enclosure, totally different feeling.
The Colors That Work Best for Drenching
Not every color works. I've seen people try this with bright yellow and it looked like the inside of a school bus. Some guidelines:
Deep, Saturated Colors (Best Results)
These are the colors that were basically made for drenching:
- Hunter Green / Forest Green — Hunt Club SW 6468 (LRV 4), Backwoods 469 Benjamin Moore (LRV 4). The classic. Deep, warm, library vibes.
- Smoky Jade — Hidden Gem N430-6A Behr (LRV 12). The 2026 Color of the Year that was designed for this technique.
- Deep Plum — Divine Damson by Graham & Brown (LRV ~7). Moody, warm, dramatic.
- Charcoal Brown — Silhouette AF-655 Benjamin Moore (LRV ~8). Warm and complex.
- Navy — Hale Navy HC-154 Benjamin Moore (LRV 6). Timeless choice.
Warm Neutrals (Subtle but Effective)
Drenching doesn't have to be dramatic. Warm neutrals create a cocoon that's more gentle:
- Warm Taupe — Shiitake SW 9173 (LRV 39). Enveloping without being dark.
- Mushroom — Stone Hearth 984 Benjamin Moore (LRV 28). Earthy and calm.
- Warm Khaki — Universal Khaki SW 6150 (LRV 37). The 2026 COTY that works beautifully drenched.
Warm Whites (The Safe Entry Point)
If the idea of a fully green room gives you anxiety, start here:
- Warm Off-White — White Dove OC-17 Benjamin Moore (LRV 85). When you drench a room in warm white—walls, ceiling, trim—it feels serene and spacious. Way more intentional than the typical "white walls, whiter trim" approach.
- Creamy White — Alabaster SW 7008 (LRV 82). Similar effect but slightly warmer.
Colors to Avoid Drenching With
Some colors just don't translate:
- Bright or primary colors — Red, bright blue, saturated yellow. Too stimulating when they're everywhere.
- Cool grays — Already feel lifeless on walls alone. Covering the ceiling too makes it feel like a bunker.
- Very pale pastels — They can read as "unfinished" rather than intentional. If you're going light, go warm white instead.
- Colors with strong green-gray undertones — Can read as sickly when there's no white trim to ground them.
The Sheen Trick (This Is the Secret)
Here's what most articles about color drenching don't tell you: you should vary the sheen even though the color stays the same.
Same color, different finishes. This adds subtle dimension without breaking the drenching effect:
| Surface | Recommended Finish |
|---|---|
| Walls | Matte or eggshell |
| Ceiling | Flat or matte |
| Trim & molding | Satin or semi-gloss |
| Doors | Satin |
The higher sheen on trim and doors catches light differently, so the architectural details don't completely disappear. You still get the immersive color effect but with enough texture that the room doesn't feel flat.
My friend's green dining room? Matte on walls, flat on ceiling, satin on the crown molding. When candlelight hit the molding, it shimmered just slightly against the matte walls. That's the magic.
Room-by-Room Guide
Dining Room (The Easiest Win)
This is where I tell everyone to start. Dining rooms are typically smaller, used mostly in the evening (when moody lighting works in your favor), and you want them to feel special. A drenched dining room in deep green or charcoal brown with warm lighting is genuinely one of the best design moves you can make.
Bedroom (The Cocoon)
Bedrooms are the second-best candidate. You're literally trying to create a cocoon for sleeping. A drenched bedroom in a deep, muted color—think smoky jade or warm taupe—feels incredibly restful. Just make sure you like the color at all hours. Check it first thing in the morning and last thing at night.
Powder Room (The Statement)
Small powder rooms are perfect for drenching because they're small enough that the effect is immediate and you don't spend hours in there. This is where you can go bold—plum, deep teal, even a rich terracotta.
Home Office (The Focus Zone)
A drenched home office in a deep green or blue-green creates this concentration-enhancing environment. No visual breaks, no contrast pulling your eye around. Just you and the work.
Living Room (Proceed With Caution)
Can you drench a living room? Yes. Should you? Depends. If it's a separate room with defined walls, absolutely. If it's an open-concept space that flows into the kitchen, it gets tricky. You need a natural break point—a doorway, a change in ceiling height, something—or the drenching effect bleeds awkwardly into the next space.
Step-by-Step: How to Actually Do It
1. Pick Your Color
Choose a color in the right range—deep enough to create mood but not so dark that it eats all the light. LRV between 4 and 40 is the sweet spot for dramatic drenching. LRV 60-85 for subtle warm-white drenching.
Test it on the wall first. And I mean a BIG swatch—at least 3x3 feet. Color drenching amplifies whatever the color does. If a small swatch looks slightly off, a whole room of it will look very off.
2. Calculate Your Paint
You'll need more paint than a standard room because you're covering the ceiling and trim too. A typical 12x12 room with 8-foot ceilings:
- Walls: ~2 gallons
- Ceiling: ~1 gallon
- Trim/doors: ~1 quart (in satin or semi-gloss)
3. Prep Matters More Than Usual
When everything is the same color, imperfections are MORE visible, not less. Patches, nail holes, uneven texture—they all show because there's no contrast to distract the eye.
- Fill all nail holes and sand smooth
- Caulk gaps between trim and walls (these will scream at you if left unfilled)
- Prime any patches
4. Paint in the Right Order
- Ceiling first (flat/matte)
- Walls second (eggshell/matte)
- Trim and molding last (satin/semi-gloss)
Even though it's all the same color, doing it in this order prevents drips on finished surfaces.
5. The Cutting-In Situation
Here's one nice thing about color drenching: cutting in is way less stressful. If you slightly overlap onto the ceiling while painting the wall... who cares? It's the same color. The margin for error at transitions is basically gone.
This alone makes it the most forgiving technique for DIYers. Seriously.
Common Mistakes
Going too small with the sample. A 2-inch chip tells you nothing about how a color will feel when it's covering every surface. Test big.
Forgetting about lighting. Drenched rooms need intentional lighting. Dark drenched rooms with bad overhead fluorescents will feel like a cave. Warm-toned lamps, sconces, candles—layer your light sources.
Ignoring the floor. Your floor is the one surface that ISN'T drenched. Make sure it works with the color. A dark-drenched room with light oak floors? Beautiful contrast. Dark-drenched with dark floors? Now you're in a black hole.
No texture variety. Same color, same sheen everywhere = flat and lifeless. Use the sheen trick. Add textured elements—woven baskets, a chunky throw, wood furniture—to break up the uniformity.
Preview Before You Commit
Color drenching is a bigger commitment than painting a single wall because you're going all-in. If you get it wrong, you're repainting five surfaces instead of one.
I strongly recommend previewing the color digitally before buying anything. Open Muro and see what the color actually looks like in your specific room, with your specific lighting. It won't be perfect—no screen is—but it'll save you from the "oh no, this is WAY darker than I expected" moment.
The Bottom Line
Color drenching is trending for a reason. It's actually easier to execute than traditional painting (no precision cutting-in at color transitions), it makes rooms feel intentional and designed, and it taps into that cocooning desire that's driving all of 2026's design trends.
Start with a small room. Pick a color with enough depth to create mood but enough warmth to feel inviting. Vary your sheens. Layer your lighting.
And don't overthink it. The beauty of drenching is its simplicity—one color, one room, total transformation.